
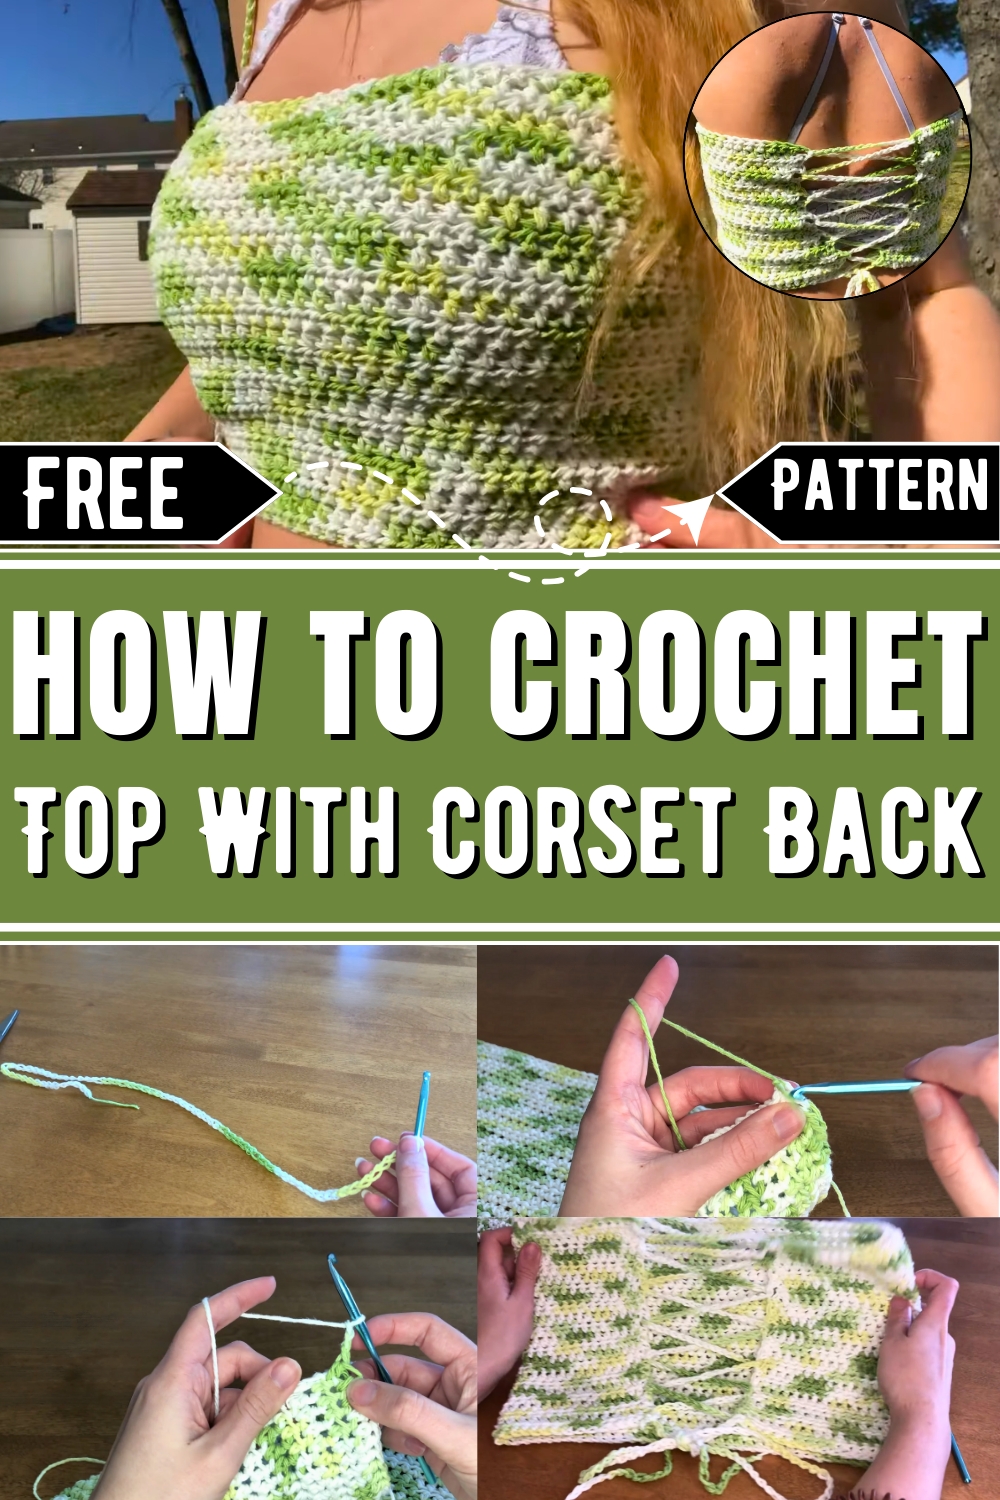
Elevate your summer wardrobe with a versatile, adjustable crochet bandeau top featuring an elegant corset back; perfect for any occasion and easy to customize.
Crochet Bandeau Top With Corset Back
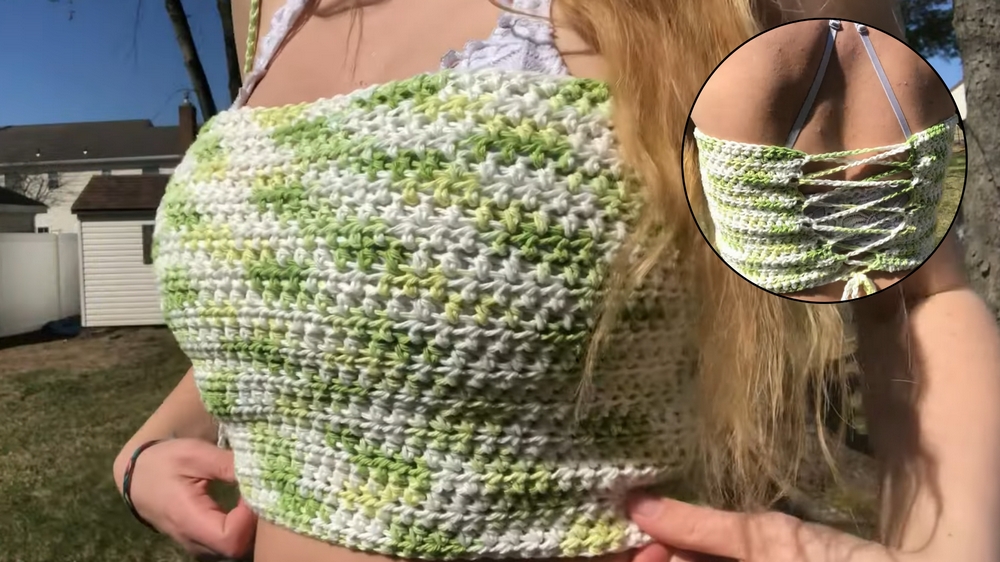
A summer wardrobe staple, the crochet bandeau top with a corset back brings together style, comfort, and versatility. This free pattern is designed to be not only beginner-friendly but also effortlessly customizable. Whether you’re attending a casual hangout, relaxing on the beach, or dressing up for a festival, this top adapts beautifully to suit the occasion. The corset back adds a unique touch, allowing for adjustable sizing while providing an elegant design detail that sets it apart from ordinary tops.
One of its biggest advantages is its ability to cater to personal preferences. Choose bright colors to match summer vibes, or opt for neutral tones for a more understated look. Lightweight and breathable, the crochet material ensures you stay comfortable even on warmer days, while its reusable nature contributes to a sustainable wardrobe.
This bandeau top is not just functional but also an excellent opportunity to showcase handmade fashion at its best. Easily paired with skirts, shorts, or layered with other outfits, it’s a versatile choice that provides endless styling options. Whether for yourself or as a thoughtful gift, this summers crochet top pattern is a wonderful blend of style, practicality, and self-expression in one elegant design.
How To Crochet Bandeau Top
Materials
- Yarn: The specific type of yarn isn't mentioned in the transcript, but you would need yarn suitable for crochet projects (e.g., cotton, acrylic) in the desired color.
- Crochet Hook: The size isn't mentioned explicitly, but typically, a hook size matching your yarn's weight (e.g., 4mm - 5mm) would work.
- Scissors: To cut off excess yarn.
- Tapestry Needle: To tuck in ends and finish the project.
Abbreviations
- Ch: Chain
- Used for the foundation of the piece (e.g., chain 70 for the initial piece and chain 300 for corset lacing).
- Sl St: Slip Stitch
- Used for joining stitches neatly.
- HDC: Half Double Crochet
- A stitch used throughout the rows of the bandeau top body.
- SC: Single Crochet
- Used for creating edging and loops along the sides of the top.
- YO: Yarn Over
- The action of wrapping yarn around the hook as part of creating stitches.
- St: Stitch
- Refers to individual chains or slots into which the hook is inserted.
Step-by-Step Instructions
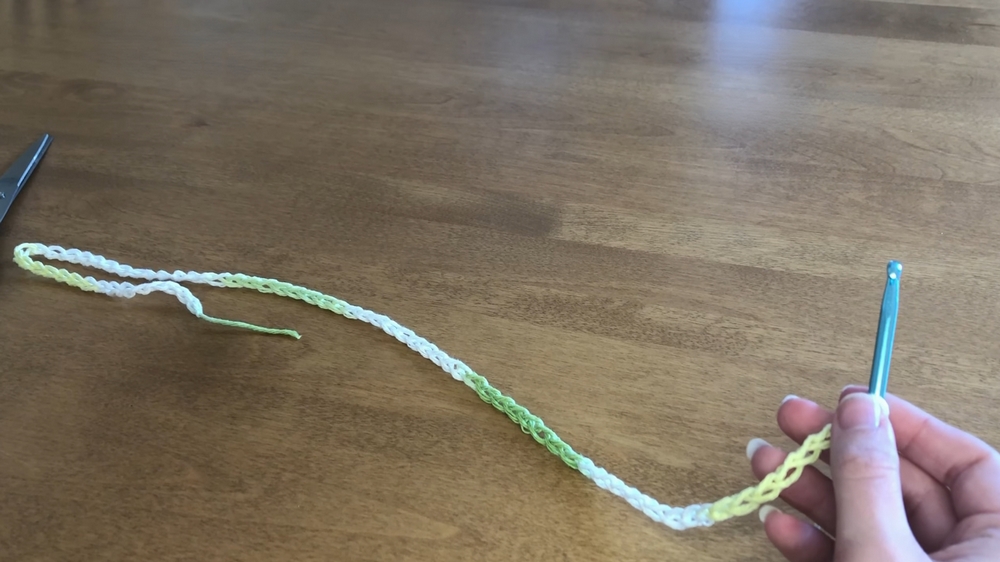
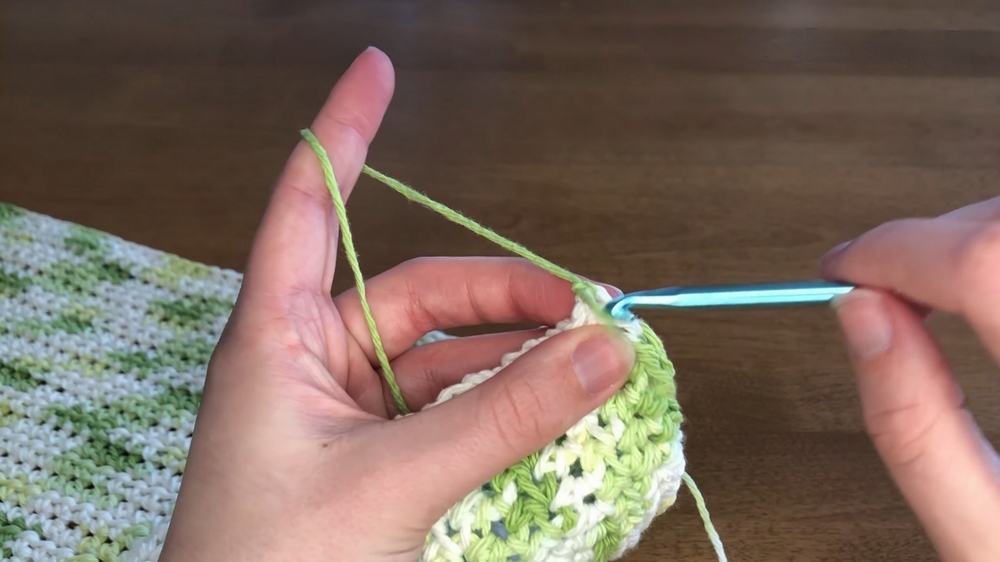
1. Creating the Base of the Bandeau Top
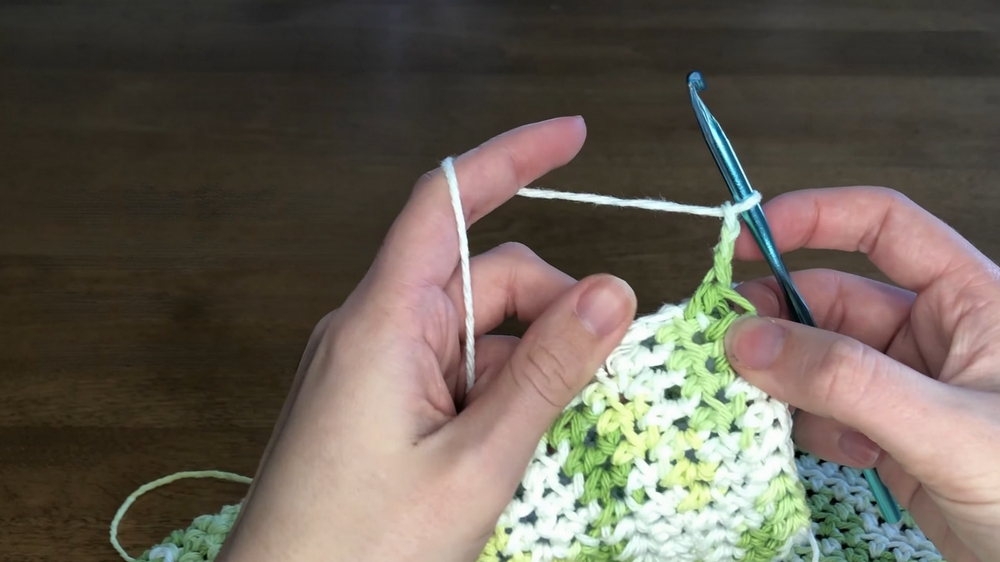
- Begin by making a slip knot and then chain 70 stitches.
- Skip the first stitch, yarn over, and work a half double crochet into each chain across the row.
- Continue repeating this process back and forth for 25 rows (for a size small). Adjust the number of rows for different sizes.
- Once the base panel is complete, turn your work and prepare for the lace-up design.
2. Adding the Lace-Up Details (Right Side)
- Chain 3 and skip the first row.
- Begin adding single crochets:
- Insert into the second row for a single crochet.
- Insert into the third row for another single crochet.
- Repeat for the fourth row.
- Chain 2, skip the stitch between rows, and continue with single crochets in the next rows using the same pattern.
- Work your way down the entire side, creating evenly spaced loops for lacing.
- At the bottom, chain 3 and secure with a slip stitch into the last stitch to finish this side.
3. Adding the Lace-Up Details (Left Side)
- Start from the opposite top corner and repeat the same steps:
- Attach your yarn securely using a knot.
- Chain 3 and skip the first row.
- Follow the same single crochet and chain-2 pattern as described for the right side.
- Ensure the loops on both sides are identical for even lacing.
- End by chain 3 and slip stitching into the last stitch on this side.
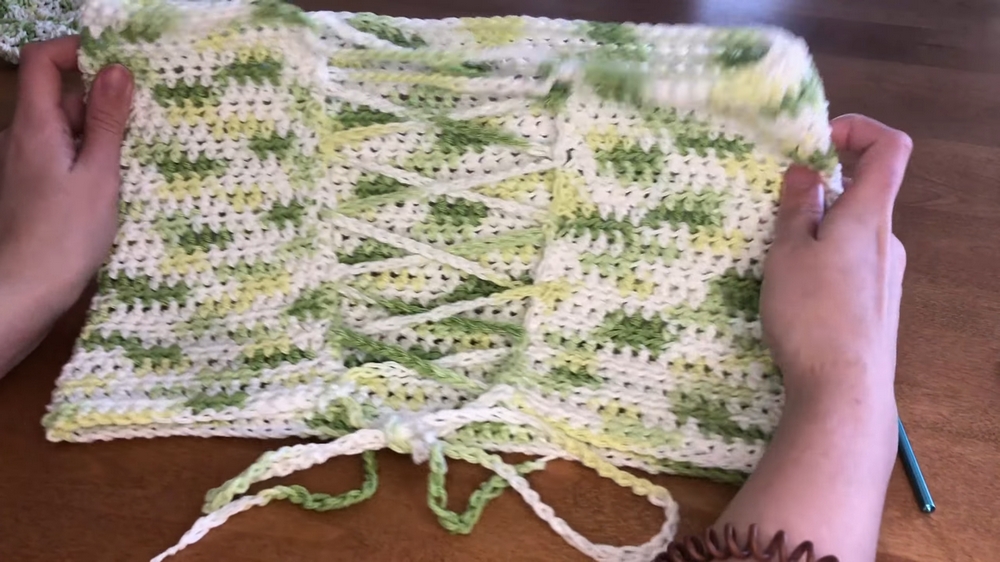
4. Creating the Lace for the Corset
- To make the lace for tying the back:
- Chain 300 stitches (adjust the length as needed for your size).
- Cut the yarn and pull it through to secure.
- Thread the lace through the loops:
- Start from the top and alternate between the sides, skipping every other hole to create the crisscross lacing pattern.
- Start from the top and alternate between the sides, skipping every other hole to create the crisscross lacing pattern.
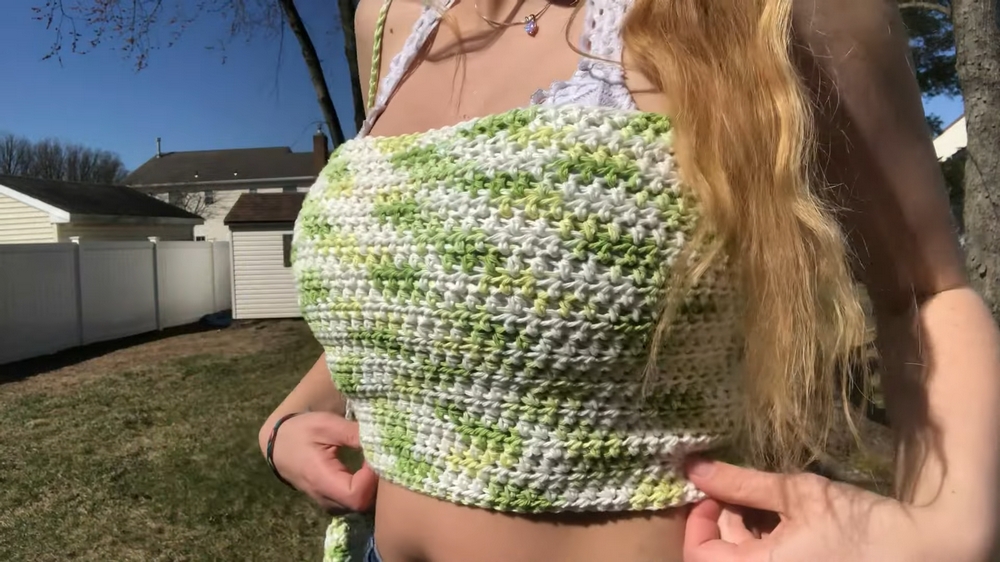
Final Product and Conclusion
Once laced, your crochet bandeau top will feature an elegant corset-style back and a comfortable fit. This simple yet stylish design can be customized to fit various sizes by adjusting the number of rows and stitches. Perfect for summer wear or paired with other handmade accessories, this versatile piece is a delightful addition to your wardrobe. By following these steps, you can create a beautiful crochet bandeau top that combines practicality and style.


